City Buildings
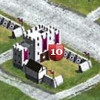
1) Castle:
 is where you can view the overview of your cities resource production, change your tax rate, view your owned wildernesses, select whether you want your troops to defend or hide in the sanctuary, view your buildings overview, as well as increase your happiness and gold. How many wildernesses you can own also depends on the level of your castle. You can own only as many wilds as the level of your castle. So, for example, in a city with a level 7 castle you are able to own 7 wildernesses. You can also Abandon your city in your Castle. **Note when you abandon your city you will lose all the might gained from buildings in that city, you will lose all of your resources in that specific city, and you will also lose any troops that you have trained that are currently residing in that city as well.**
2) Knights Hall:
 is where you can appoint knights, and assign them to roles. Starting off the game you should have at least 5 knights in each of your cities. Four of which will be assigned to one of each of the available roles. One knight will remain Idle for attacking. Your knights will build up skill points, and their skill points should be assigned according to their current role. Idle knights skill points will be assigned to Combat. Knights help shorten build, training, research time, as well as, giving you a resource bonus (which can be viewed in your castle).
3) Wall:
 provides defence for your city. The higher your wall's level, the defences you can build become more sophisticated. You can build both your Wall Defences (trebuchets and crossbows) and your Field Defences (caltrops, spikes, and traps) by clicking on your Wall. Any defences you build up in any city are only for that specific city. Defences must be built up separately for each city. You can also view the defences that you have training or queued to train.
4) Alchemy Lab:
 is where you can research new technologies that help improve your: training speed, building speed, army's defence/attack/marching speed/health/carrying load, your cities defences, resource production, and your cities resource storage. Any research done in any of your cities applies to the rest of your cities. Therefore, you do not necessarily need an Alchemy Lab in each of your cities, but with an alchemy lab in each city you can research one technology in each city constantly. So, if you have two cities you can research two things at once!!! Wahoo!!! Your knight assigned to the role of Achemystic will help reduce your research time.
5) Embassy:
 Are you in an Alliance yet? Hard to do so without one of these. Your level 1+ embassy will allow you to join into any already created alliance. Your level 2+ embassy will allow you to create your own alliance. You can also view alliances and send them requests to join from your embassy. Already in an alliance? Well the level of your embassy determines how many reinforcements your alliance members can send to you incase you are being attacked! You must have a separate embassy in each city. So, if your embassy is at a level 5 in your first city and a level 3 in your second city, your fellow alliance members can send 5 reinforcements to your first city and only 3 reinforcements to your second city.
6) Barracks:
 is where you train your army (infantry, calvary, and siege weapons). Unlike most of the other buildings, where you only need one of them, barracks are more useful in large numbers. Each of your cities should have 9-12 barracks in them. The more barracks you have the more troops you can queue up to train. It puts your troops on a waiting list to be trained. Also, the more barracks you have will decrease your training time. The higher the level of your barracks will decrease your training time as well. The higher barracks will also let you train higher class troops.
 Your knight assigned to the role of Marshall will decrease your troops training speed the higher his combat skill is.
7) Rally Point:
 is where you can view your troops, march your troops to specific coordinates (to scout, attack, transport, reinforce, or reassign), you can also manually attack members of a friendly alliance in your rally point (although this is normally a very bad idea which will more than likely cause serious beef between alliances), or recall your troops that are encamped at a wilderness or reinforcing one of your fellow alliance members.
8) Market:
 is where you can buy resources (with gold) and sell resources (for gold). Although, in your market you can only buy and sell with people in your providence (your dotted red section on the map). You cannot buy and sell to everyone on the entire domain.
9) Watch Tower:
 The higher level your watch tower the more information you will receive about incoming attacks on your city. This is very important. The information you receive will allow you to decided whether you are going to defend or hide. You can also find out how far away the attack is. This is also very important because defending on how long it takes for an attack to hit will determine which of your alliance members can reinforce you. You have to have a separate watch tower in each of your cities.
10) Storehouse:
 The current level of your storehouse informs you of how many of each resource it will protect. Storehouses only protect food, wood, stone, and ore. Storehouses DO NOT protect your gold. Your storehouse will protect each resource 100,000 times the current level of your storehouse. So, if your storehouse is at a level 5 it will protect 500,000 food, 500,000 wood, 500,000 stone, and 500,000 ore.
 11) Tavern:
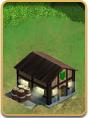 Tavern increases your populations happiness. The higher the happiness the more people will live in your city. The more people that are living in your city means more people to work in your resource fields, more idle population (which is people that you use to train troops), and the more people you have paying taxes (which means more gold for the king!).
12) Blacksmith:
 creates all metal weapons and armor for your troops. The higher level blacksmith you have the better the metal technologies are that you can research.
13) Workshop:
 is needed to build up your wall, and to build your siege weapons. The higher the level the higher level wall you can build and the more advanced siege weapons become available to train.
14) Stable:
 is needed to train horse troops and build up your Relief Station.
15) Relief Station:
 will greatly decrease your marching speed to and from your own cities and your fellow alliance members cities. NOTE: When you are about to march the estimated march time does not take into account the level of your relief station. When you actually send the march you will see the new time on your troop movement counter in the lower left hand corner of the game (above the global/alliance chat box).
16) Cottage:
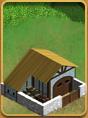
 will increase your population. This is the only other city building besides barracks that you will need more than one of. You should have 8-10 cottages in each city.
Resource Field Buildings
1) Farm:
 will increase your food production with each level build. Food will be the most important resource you have to constantly monitor. If you do not have enough food to feed your troops your troops will desert you, and just as if they died you will lose all the might you gained from the lost troops. All run away troops will have to be retrained. Your knight assigned the role of Stewart in your knights hall will give you a resource bonus, which you can view in your castle. The higher your Stewart's resource skill the higher the bonus.
2) Sawmill:
 will increase your wood production more and more with each level build. You only need 4-6 sawmills in each city. Your knight assigned the role of Stewart in your knights hall will give you a resource bonus, which you can view in your castle. The higher your Stewart's resource skill the higher the bonus.
3) Quarry:
 will increase your stone production with each level build. You only need 3-5 quarries in each city. Your knight assigned the role of Stewart in your knights hall will give you a resource bonus, which you can view in your castle. The higher your Stewart's resource skill the higher the bonus.
4) Mine:
 will increase your ore production with each level build. You only need 4-6 mines in each city. Your knight assigned the role of Stewart in your knights hall will give you a resource bonus, which you can view in your castle. The higher your Stewart's resource skill the higher the bonus.
No comments:
Post a Comment